1/28/2012

An extruder rectangular cane (polymer clay tutorial)

Making this polymer clay cane is very simple... if you have a clay extruder! (about extruders for polymer clay, those with a screw mechanism are far easier to use than those with a simple piston to push on which need a lot of strengh!).
Choose 6 colors (for me greens and two contrasting colors, black and beige). This is better to use these contrasting colors, the extruder cane will have nicer patterns.
 
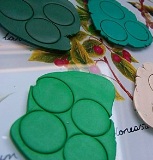
With a pasta machine or a rolling pin, flatten your colors ; then cut them into equal pieces (I usually use the extremity of my extruder as a cookie cutter to get even rounds). 
 Randomly combine these small rounds.
Using the square disk of your clay extruder (mine is the Makins Professional Ultimate Clay Extruder, aluminium & screw mechanism, very nice, easy to use), you get a very long square extruder cane. It looks better if you turn quite slowly and if the polymer clay is not too cold. With cold polymer clay or by turning too fast you will get an extruder cane with "broken up" corners (that's not a real problem as it looks pretty also but it's better to have an extruder cane with smooth corners for our final cane).
 
Cut this long extruder cane into equal pieces (use a ruler if needed!) and combine the different parts.
Make the different parts stick together, without distorting them. Gently press the different sides of the cane as if you wanted to reduce it. You can also use a small  rolling pin for the large sides.
Then you just have to wrap your rectangular cane into one nice matching color (here I chose black). 
Flatten the color you want to use with your pasta machine or a rolling pin. Putting your rectangular extruder cane on the flattened sheet, use it as a template to cut 4 pieces (one for each side) in it.
Stick these 4 pieces on each side of your rectangular cane, be careful for air bubbles (make sure you press from the middle to the edge). 
"Merge" the different pieces by rubbing the junctions with shrink-wrap or using latex gloves.


1/25/2012

How to drill holes in fimo beads

Yes, I love writing articles on crucial subjects.
 
There are two "usual" ways of drilling holes in fimo beads : before or after baking (what a surprise, I know). The "before" method requires less equipment than the "after" one.
 
Making holes in fimo beads before baking:
 
You may use a needle or a toothpick, this is very simple. However you have to be very careful as your polymer clay is still unhardened. The best thing to do before drilling is to put your raw beads in the fridge (or at least stop manipulating them). Let them a few time to be sure they are cold enough to be handled without being too easily destorded. When drilling the hole, gently rotate the bead around the needle. Be careful with "old" clay, it may be a bit dry and crack easily.
 
Instead of a needle or a toothpick, depending on the size of the hole you want to drill, you may use a very small round cookie cutter. For example to drill holes in my donuts (not the hole in the middle, it would be a little too easy! No, the hole to put the cable or ribbon) I use the little ink tube of a Bic pen. This is far from being a very professional cookie cutter but... it works! For my hole to be clean, I put plastic film on the fimo donut before drilling.
 
So... drilling holes in fimo beads before baking is very simple. And it offers the possibility of baking your beads on a rack, what's really handy. However this method may not be convenient with very small or thin pieces, easily distordable when raw... you have to choose our second option.
 
Making holes in fimo beads after baking:
 
This is when, in my case, it becomes very spectacular (or only a little, maybe).
 
Our fimo beads are hard, we need a drill. A Dremel tool is the most suitable for polymer clay. Unfortunately I don't have the tools of a professional beads maker, I have the tools of a professional... (herm don't know, carpenter maybe...). So I've got this : 

(Yes, it is about 80 centimeters high)
 
However the main point is not the size of the drill itself but the size of the drill bits we use with it. The smallest I use are 1mm. They are small and consequently easily breakable... be gentle when pushing them into the bead. 

Let the polymer clay fragments go out from the bead, pulling up (without taking it out) the drill bit from time to time. Use a drill vice to hold the bead (and nooooot your fingers, of course). When the drilling is almost done, this is the moment when the extremity of your fimo bead is likely to crack if you're not careful. Don't go too fast!
 
Drilling holes with a real drill takes equipment and a little of know-how but is still very simple. An important thing to know : don't try to drill holes into cold fimo beads with this method (for example if your drill is in your garage which is not heated, this is very tempting to store your beads "to be drilled" in this garage, but this is a very bad idea! Cold beads are far more likely to be broken!).
 
If the bead you want to drill is really too thin... In this case, what I usually do is drilling a first hole, very small and without even going through the whole bead, before baking (with the smallest needle I've got) and enlarging this hole after baking. With a small drill bit (manually, you just have to stuck a drill bit on something you can easily handle and rotate!). 

1/23/2012

How to make a striped cane with polymer clay

In this tutorial I show you how to realize color stripes with polymer clay (Fimo) to make a striped cane.
This is a very simple and basic method but striped canes are very nice to use, they make colourful and original creations ! 
 
Here I chose five blue / purple colors. I also use black clay to put between my stripes (of course you can use another color or even not put a contrasting stripe between your colors!) 
With my pasta machine, I stretch each of my colours into a thin sheet. I usually make the black sheet thinner than the coloured ones (for example here I used 4 for colors and 6 for black). If you don't have a pasta machine, no worries, just use a glass or something quite alike to roll on your clay. To ensure the thickness of the sheet is the same everywhere, you can flatten your sheet between two surfaces with the same thickness. 
 
Once we have our sheets, we just have to cut them into pieces the same size and shape. I use razor blades but you may also use cookie cutters... Actually it's even easier to use cookie cutters as your pieces are more likely to be similar! I usually cut rectangular pieces but they may be square... 
The only thing left to do is to put together all of our little pieces. Putting a black slice between two colored ones... Be careful for air bubbles, they tend to appear between slices. Make sure you stick them quite slowly, pressing from the middle to the edge. 
Once I've got my cane, I just "press it" with a flat stuff (made of glass, for clay not to stick on it!), to make the different slices stick together without deforming them. 
Here we go, we just have to cut our final pile (the highest it is, the most difficult!) and to use it... :) 


1/22/2012

Welcome!

Having a passion for polymer clays (Fimo, Sculpey), beads and natural materials (wood, leather, silver, gold, precious stones...), I invite you to discover my latest creations. I also offer some tutorials and personal tricks.
Don't hesitate to write comments, I will be very happy to answer !

And... forgive my bad English, I am one of these numerous French Londoners ! 

I wish you a very pleasant visit ! :)