Handmade with Love: Colorful Fimo Keyrings for Everyday Joy (and a Bit of Chaos)
If you're anything like me, your keys spend more time hiding in the abyss of your bag than actually unlocking doors. That's why I decided to brighten things up—with a(nother) set of handmade polymer clay keyrings, each one a mini explosion of color, beads, and joy. And let’s be real: it’s also a great excuse to play with Fimo clay and beads again!
✨ Four Unique Keyrings, All Handmade
Let’s dive into the keyring collection I just finished. Each of these is a little piece of my creative chaos—assembled with love (and a surprising number of beads rolling onto the floor).
1. Green Pop & Dots
Stone and fimo slices, spiral bead, a bit of a retro leafy charcoal-finished fimo bead, some flower beads on silver rings and that eye-catching green polka dot ribbon—for the bold-hearted keychain lover.
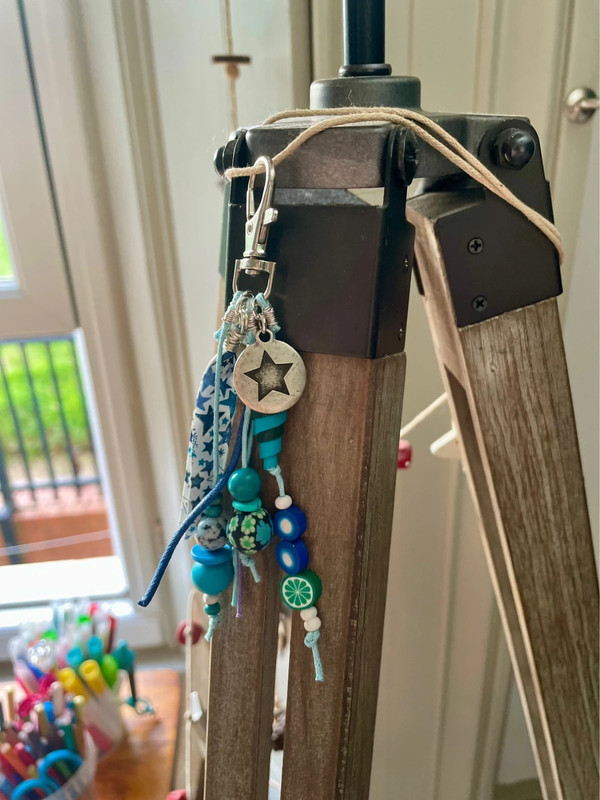
2. Turquoise & Starry Dreams
A blend of turquoise polymer beads, wooden accents, and a bold silver star charm. Strung on cotton thread, this one has serious beachy vibes.
3. Modern Geometric Garden
Think zen garden meets modern mosaic. Featuring stacked green beads, a subtle flower charm, and a geometric black-and-green tile bead (one of my favorites of all time this one!), minimalist but still full of character.
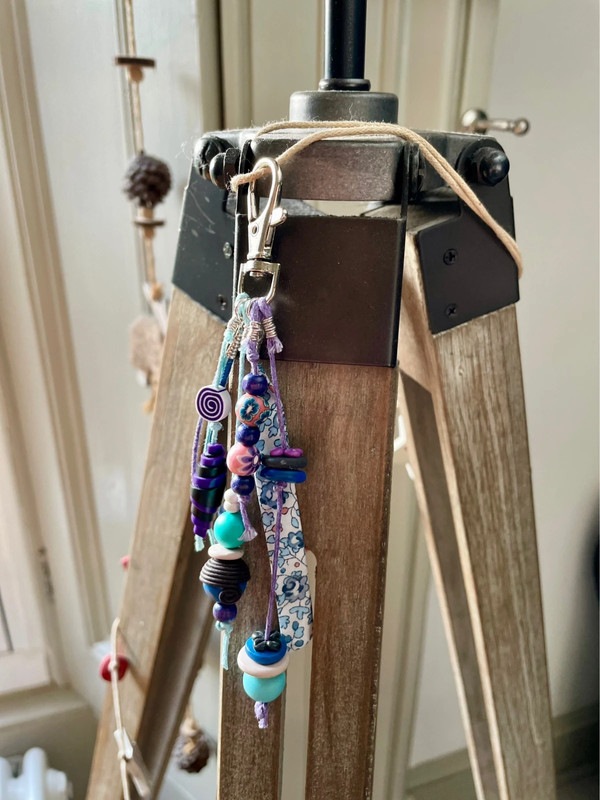
4. Fairy Tales (or Princessy) Vibes
Some whimsical bead shapes for the last one - which gives serious enchanted forest energy, somehow. If your keys lived in a fairy tale, they’d wear this.
True story: while I was carefully threading my beads, selecting the perfect Fimo accents, and fiddling with metal rings like a seasoned crafter (or not), my daughter decided she’d make her own keyrings too. Let’s just say hers involved a lot more pink and glitter.
We had a full-on bead explosion across the table, followed by the ceremonial "who gets the last clasp" negotiation. (Spoiler: she won).
📌 Tags & Keywords
handmade Fimo keyrings, polymer clay keychain, colorful beaded keyring, DIY accessories, unique handmade gifts, polymer clay jewelry blog, handcrafted keyrings,