To
make beautiful (fimo or not) bracelets and necklaces, we use bead caps, spacers,
cones and other beading accessories.
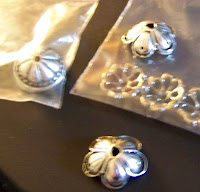
For example these silver bead
caps on the" Little India" necklace:
Bead
caps can be directly bought from shops (if we find the right sizes and that's
not always as easy as it seems!), but they also can (and it is much funnier!)
be home-made.
Here is a tutorial to make your own silver or golden bead caps from fimo clay.
Equipment
Some gold or silver powder and a brush
Some ugly left over fimo clay
Some gold or silver powder and a brush
Some ugly left over fimo clay
Fimo
beads (already hardened in the oven)
matching the size you wish for your bead caps
Needles (toothpicks, needles, cooking needles for fimo)
A small punch (no matter its shape) or the extremity of your fimo extruder
Needles (toothpicks, needles, cooking needles for fimo)
A small punch (no matter its shape) or the extremity of your fimo extruder
Tutorial:
Stretch
the leftover fimo clay with your pasta machine or rolling pin and use your
punch to cut identical shapes inside it. Cutting identical shapes allow to have
the same quantity of clay (and thus the same final size!) for every bead cap.
Depending on the size you
want your bead caps to be, make balls out of one or several of the shapes you
previously cut. Think about: these balls will then be cut in two... Now you've
been thinking, cut them!
Plant a needle in the
middle of every half sphere:
And push it into the hole
of your hardened fimo bead:
What's left to do is to
sculpt your bead cap to make it fit closely the shape of the fimo bead, then to
sculpt it to give it a nice look:
I
use small tools (they look like dentists' tools a bit...) to make different
patterns & curves in my bead caps:
Once your bead cap is shaped, you just have to cover it with gold or
silver powder (with a small brush) and remove it from the fimo bead to put in
into the oven (you can leave it on the needle you used).


